Khaja Recipe | Crispy Layered Indian Sweet Khaja
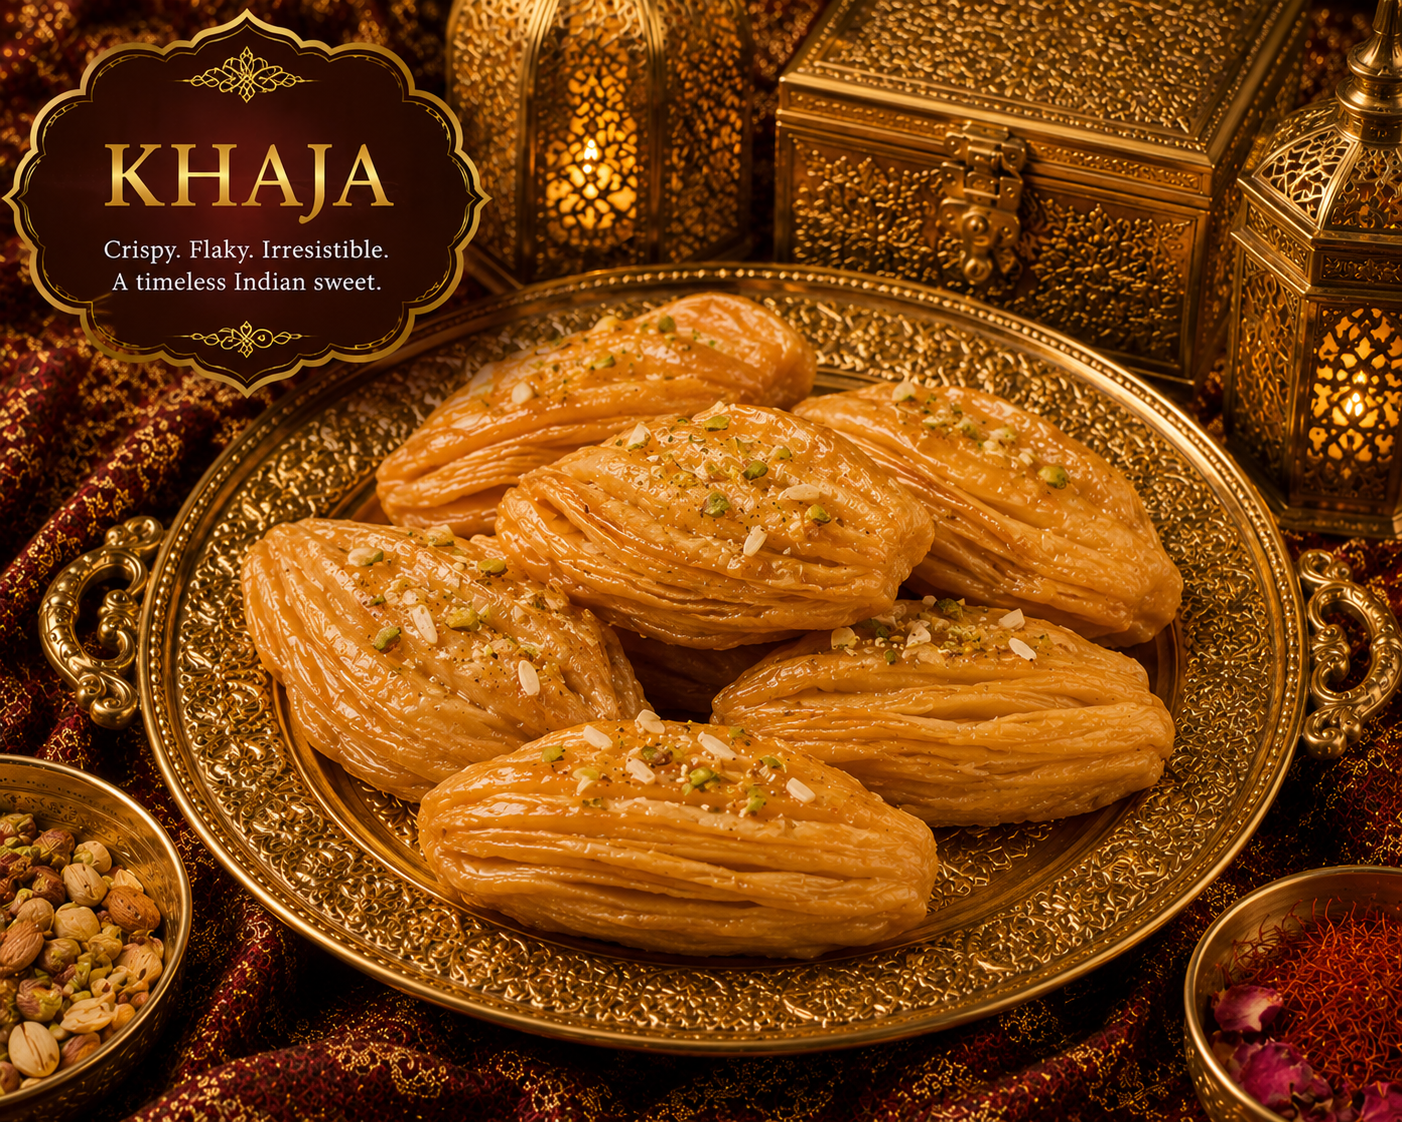
Learn how to make authentic Khaja at home with this detailed step-by-step recipe. Khaja is a famous traditional Indian sweet known for its delicate flaky layers, crispy texture, and sugar-coated exterior. Popular in Bihar, Odisha, Andhra Pradesh, and especially as a sacred offering at the Jagannath Temple in Puri, Khaja is loved for its beautiful layered structure and melt-in-the-mouth crunch. This recipe includes professional techniques to create perfectly layered, crispy, and delicious Khaja every time.
Recipe Overview
Recipe Summary
Prep Time
45 Min
Cook Time
30 Min
Rest Time
15 Min
Difficulty
Moderate
Yield
20 Pieces
Calories
180 kcal
About This Recipe
Khaja is one of India’s oldest layered sweets, celebrated for its crisp texture and beautiful flaky layers. Made using flour, ghee, sugar syrup, and a special folding technique, Khaja develops multiple delicate layers that become light and crunchy after frying.
The secret to exceptional Khaja lies in creating thin dough sheets, applying a flour-ghee paste between layers, rolling carefully, and frying slowly until golden. Once fried, the Khaja is dipped in sugar syrup that adds sweetness while preserving its signature crunch.
This traditional recipe follows authentic methods used by sweet makers for generations, helping you create bakery-style Khaja at home with detailed instructions and expert chef tips.
Why You’ll Love This Khaja Recipe
- Authentic traditional recipe.
- Beautiful flaky layers.
- Perfect festive sweet.
- Crispy and crunchy texture.
- Simple pantry ingredients.
- Great for gifting.
- Long shelf life.
- Perfect for celebrations.
- Temple-style flavor.
- Includes professional layering techniques.
What Makes This Khaja Special?
Unlike ordinary fried sweets, Khaja relies on a unique lamination process similar to puff pastry. Multiple thin layers separated by a ghee-flour paste create the characteristic flaky structure. When fried correctly and coated with sugar syrup, the result is a crisp, layered sweet that shatters delicately with every bite.
For the Dough
For Layering Paste
For Sugar Syrup
For Frying & Garnish
Equipment Needed
Ingredient Substitutions
- All-purpose flour can be replaced partially with fine wheat flour.
- Ghee may be replaced with unsalted butter, though traditional ghee gives the best flavor.
- Cardamom powder can be replaced with saffron for a royal aroma.
- Sugar syrup can be flavored with rose water.
- Pistachios may be replaced with almonds or cashews.
- Oil can be used instead of ghee for frying.
- Powdered sugar can be used for a lighter coating variation.
- Orange blossom water can be added for a unique flavor profile.
- Jaggery syrup can be used for a traditional rustic variation.
- Silver leaf can be omitted if unavailable.
Step-by-Step Instructions
Prepare the Dough
Combine all-purpose flour, salt, and ghee in a large mixing bowl.
Rub the ghee into the flour until the mixture resembles breadcrumbs.
Gradually add water and knead into a smooth, medium-firm dough.
👨🍳 Chef Tip: The dough should be firmer than chapati dough to create crisp, flaky layers.
Rest the Dough
Cover the dough with a damp cloth and allow it to rest for 15–20 minutes.
This helps relax the gluten and makes rolling easier.
👨🍳 Chef Tip: Resting improves elasticity and prevents tearing while rolling thin sheets.
Prepare the Layering Paste
Mix flour and ghee together in a small bowl until a smooth paste forms.
Ensure there are no lumps.
👨🍳 Chef Tip: This paste acts like the laminating layer that creates Khaja’s signature flaky structure.
Roll the First Sheet
Divide the dough into equal portions.
Roll one portion into a thin rectangular sheet.
The thinner the sheet, the more layers you will achieve.
👨🍳 Chef Tip: Aim for uniform thickness throughout the sheet for even layering.
Apply the Layering Paste
Spread a thin, even layer of the flour-ghee paste over the rolled sheet.
Cover the entire surface except the edges.
👨🍳 Chef Tip: Too much paste can make the layers heavy, while too little reduces flakiness.
Create Multiple Layers
Roll another thin sheet and place it over the first one.
Apply more layering paste and repeat the process with remaining dough portions.
👨🍳 Chef Tip: More layers create a bakery-style Khaja with beautiful visible flakes.
Roll Into a Tight Log
Starting from one side, tightly roll the layered sheets into a log.
Keep the roll compact without squeezing excessively.
👨🍳 Chef Tip: A tight roll ensures well-defined layers after slicing.
Slice the Log
Using a sharp knife, cut the log into equal-sized pieces.
Each piece will reveal the layered spiral pattern.
👨🍳 Chef Tip: Use clean cuts rather than pressing down heavily to preserve the layers.
Shape the Khaja
Place each piece cut-side up and gently flatten it.
Roll lightly into an oval or rectangular shape.
👨🍳 Chef Tip: Avoid pressing too hard, or the layers may merge together.
Fry Slowly Until Crisp
Heat oil or ghee on medium-low heat.
Fry the Khaja pieces slowly until they become golden and crisp.
Turn occasionally for even cooking.
👨🍳 Chef Tip: Slow frying is essential for fully developed layers and maximum crispness.
Prepare the Sugar Syrup
Combine sugar and water in a saucepan and heat until dissolved.
Add cardamom powder and lemon juice.
Cook until a light one-string consistency forms.
👨🍳 Chef Tip: One-string syrup coats the Khaja perfectly without making it soggy.
Coat and Finish
Dip the warm fried Khaja into the warm sugar syrup for a few seconds.
Remove and place on a tray to set.
Garnish with nuts or silver leaf if desired.
👨🍳 Chef Tip: Both the syrup and Khaja should be warm for the best coating and shine.
👨🍳 Crispy Khaja Secrets
- Use fresh flour for the best texture.
- Keep the dough medium-firm.
- Roll sheets very thin.
- Apply layering paste evenly.
- Create multiple layers for maximum flakiness.
- Roll the log tightly.
- Cut clean slices.
- Fry slowly on medium-low heat.
- Use fresh sugar syrup.
- Allow Khaja to cool completely before storing.
🍯 Perfect Sugar Syrup Guide
To test one-string consistency, place a drop of syrup between your thumb and forefinger. When pulled apart gently, a single thin string should form.
🌟 Professional Layering Technique
Traditional sweet makers often create 4–6 layers of dough sheets separated by flour-ghee paste. This lamination process creates dozens of delicate layers after rolling, slicing, and frying.
The combination of thin sheets, proper layering paste, tight rolling, and slow frying is what gives authentic Khaja its signature flaky structure.
❌ Common Mistakes to Avoid
- Using a soft dough.
- Rolling sheets too thick.
- Applying uneven layering paste.
- Cutting the log roughly.
- Pressing too hard while shaping.
- Frying at very high temperature.
- Using thin sugar syrup.
- Overcooking the syrup.
- Skipping the resting period.
- Storing before completely cooling.
Popular Khaja Variations
- 🍯 Sugar-Coated Khaja
- 🌿 Cardamom Khaja
- 🌹 Rose-Flavored Khaja
- 🧈 Pure Ghee Khaja
- 🌰 Dry Fruit Khaja
- 🟤 Jaggery Khaja
- ✨ Temple Style Khaja
- 🍊 Saffron Khaja
- 🥥 Coconut Khaja
- 👑 Royal Festival Khaja
🍽️ Serving Suggestions
Serve Khaja at room temperature with masala chai, saffron milk, cardamom milk, or festive dessert platters. It is traditionally enjoyed during religious festivals, celebrations, weddings, and special occasions. For an elegant presentation, garnish with chopped pistachios, almonds, and edible silver leaf.
🧊 Storage Guide
🏠 Room Temperature
Store in an airtight container for up to 10 days.
❄️ Refrigeration
Can be refrigerated for up to 2 weeks, though room temperature storage is preferred.
📦 Storage Tip
Keep away from moisture to maintain crispness and flaky layers.
Make Ahead Tips
- Prepare the dough a day in advance.
- Make the layering paste ahead of time.
- Roll and shape the Khaja before frying.
- Prepare sugar syrup just before coating.
- Store fried Khaja separately until serving.
- Coat with syrup on the day of serving for maximum crispness.
- Use airtight containers for storage.
- Ideal for festivals and gifting.
🥗 Nutrition Information (Approx. Per Piece)
These values are approximate and may vary depending on ingredients and portion size.
Calories
Protein
Carbohydrates
Fat
Sugar
Sodium
❤️ Health Highlights
- Provides quick energy from carbohydrates.
- Popular festive sweet enjoyed in moderation.
- Can be prepared using pure ghee for richer flavor.
- Contains simple ingredients.
- Perfect for celebrations and special occasions.
- Pairs beautifully with tea and milk-based beverages.
- Homemade versions offer better ingredient control.
- Ideal as an occasional traditional treat.
💡 Did You Know?
Khaja is one of the most famous sweets associated with the sacred Jagannath Temple in Puri, Odisha. It is offered as part of the temple’s Mahaprasad and has been prepared using traditional methods for centuries. The sweet is admired for its unique layered texture and remarkable crispness.
Frequently Asked Questions
Why is my Khaja not flaky?
The dough sheets may have been rolled too thick or insufficient layering paste was used.
Can I use wheat flour instead of maida?
Yes, but the texture will be denser and less flaky than traditional Khaja.
How do I keep Khaja crispy?
Store it in an airtight container and keep it away from humidity.
Can I make Khaja without sugar syrup?
Yes, but traditional Khaja is usually coated with syrup for sweetness and shine.
Why did my layers disappear?
Excess pressure while rolling or shaping can cause the layers to merge.
Can Khaja be made in advance?
Yes, it stores very well and is often prepared several days before festivals.
Can I use jaggery instead of sugar?
Absolutely. Jaggery syrup creates a deeper and more traditional flavor.
What oil temperature is best for frying?
Medium-low heat is ideal to ensure the layers cook evenly and become crisp.
Can I freeze Khaja?
Freezing is not recommended as moisture may affect the flaky texture.
What makes Khaja different from other sweets?
Its signature laminated layers and delicate crispness make it unique among traditional Indian sweets.
Related Recipes You May Like
Why This Khaja Recipe Works
This recipe follows traditional sweet-making techniques that focus on dough lamination, proper layering paste, careful rolling, slow frying, and perfectly balanced sugar syrup. Together, these elements create the signature flaky texture, crisp bite, and beautiful sweetness that define authentic Khaja.
🌟 Expert Serving Tip
For a premium festive presentation, arrange Khaja on a decorative platter, garnish lightly with pistachios and edible silver leaf, and serve alongside saffron milk or masala chai. This enhances both appearance and flavor while preserving the sweet’s traditional character.
Chef’s Final Note
Perfect Khaja is all about patience and precision. Thin layers, careful rolling, slow frying, and proper syrup consistency are the keys to success. Take your time with each stage, and you’ll be rewarded with a beautifully crisp, flaky sweet that reflects generations of traditional Indian sweet-making craftsmanship.